Search This Blog

Showing posts with label MapView. Show all posts

Tuesday, 26 March 2013

Google Maps Android API v2 MapFragment tutorial - Implementing Map inside a Fragment

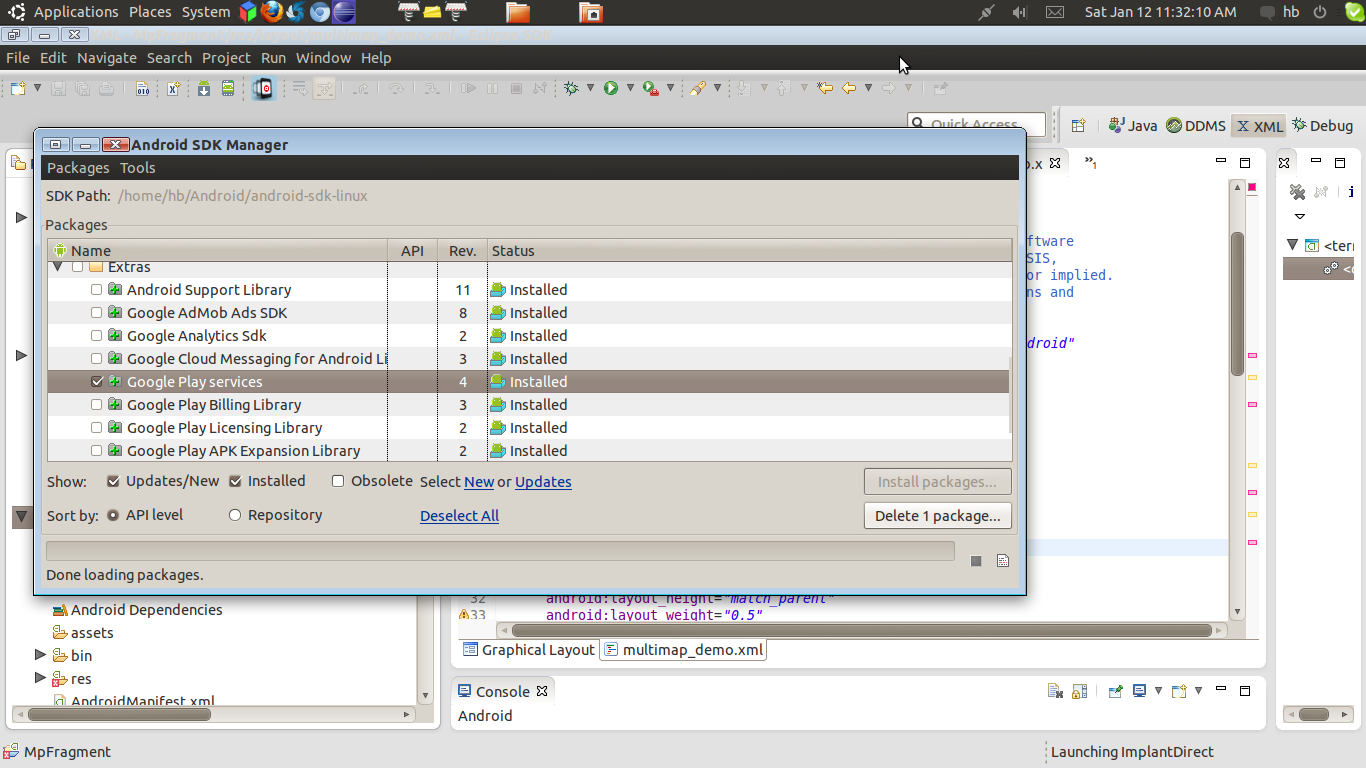
Using MapFragment Android release MapFragment to integrate Map into fragment. using Mapfragment is quite difficult to start but very simple to handle. First of all see Generating Map Key for Google Console project.  Now in Android APP API v2,  include Google play service so you need to add Google Play Service into your project.
    

See screen shot


Step 1) Change your manifest and add permission , Some permission start with you package name. So if you change package of this project than use it. My package name is com.mapfragment. Made changes to your manifest like this

<?xml version="1.0" encoding="utf-8"?>
<manifest xmlns:android="http://schemas.android.com/apk/res/android"
    package="com.mapfragment"
    android:versionCode="1"
    android:versionName="1.0" >

    <uses-sdk
        android:maxSdkVersion="17"
        android:minSdkVersion="8"
        android:targetSdkVersion="16" />

    <permission
        android:name="com.mapfragment.permission.MAPS_RECEIVE"
        android:protectionLevel="signature" />

    <uses-permission android:name="com.mapfragment.permission.MAPS_RECEIVE" />
    <!-- Copied from Google Maps Library/AndroidManifest.xml. -->

    <uses-permission android:name="android.permission.INTERNET" />
    <uses-permission android:name="com.google.android.providers.gsf.permission.READ_GSERVICES" />
    <!-- External storage for caching. -->
    <uses-permission android:name="android.permission.WRITE_EXTERNAL_STORAGE" />
    <!-- My Location -->
    <uses-permission android:name="android.permission.ACCESS_COARSE_LOCATION" />
    <uses-permission android:name="android.permission.ACCESS_FINE_LOCATION" />
    <!-- Maps API needs OpenGL ES 2.0. -->
    <uses-feature
        android:glEsVersion="0x00020000"
        android:required="true" />

    <application
        android:allowBackup="true"
        android:icon="@drawable/ic_launcher"
        android:label="@string/app_name"
        android:theme="@style/AppTheme" >
        <uses-library android:name="com.google.android.maps" />
        <!-- You must insert your own Google Maps for Android API v2 key in here. -->
        <meta-data
            android:name="com.google.android.maps.v2.API_KEY"

android:value="yourkey" />

<activity android:name=".MainActivity" android:label="@string/app_name" android:theme="@android:style/Theme.NoTitleBar.Fullscreen" > <intent-filter> <action android:name="android.intent.action.MAIN" /> <category android:name="android.intent.category.LAUNCHER" /> </intent-filter> </activity> </application> </manifest>

Step 2) Create two xml inside res/layout folder. One contain FrameLayout ( To embed Fragment inside it) and other contains MapFragment
main.xml
<FrameLayout xmlns:android="http://schemas.android.com/apk/res/android"
    xmlns:tools="http://schemas.android.com/tools"
    android:layout_width="match_parent"
    android:id="@+id/mainl"
    android:layout_height="match_parent" >

</FrameLayout>

Step 3) Do some changes inside your main activity and create one Fragment class to integrate it with in the MainActivity

MainActivity.java
package com.mapfragment;

import android.os.Bundle;
import android.support.v4.app.FragmentActivity;
import android.support.v4.app.FragmentTransaction;

import com.google.android.gms.common.GooglePlayServicesNotAvailableException;
import com.google.android.gms.maps.GoogleMap;
import com.google.android.gms.maps.MapsInitializer;
import com.google.android.gms.maps.SupportMapFragment;

public class MainActivity extends FragmentActivity {
    GoogleMap mapView;
    com.google.android.gms.maps.Projection projection;

    @Override
    protected void onCreate(Bundle savedInstanceState) {
        super.onCreate(savedInstanceState);
        setContentView(R.layout.main);
        FragmentTransaction mTransaction = getSupportFragmentManager()
                .beginTransaction();
        SupportMapFragment mFRaFragment = new MapFragmentD();
        mTransaction.add(R.id.mainl, mFRaFragment);
        mTransaction.commit();

        try {
            MapsInitializer.initialize(this);
        } catch (GooglePlayServicesNotAvailableException e) {
            e.printStackTrace();
        }
    }

}
MapFragmentD.Java
package com.mapfragment;

import android.app.Activity;
import android.os.Bundle;
import android.util.AttributeSet;
import android.view.LayoutInflater;
import android.view.View;
import android.view.ViewGroup;

import com.google.android.gms.maps.GoogleMap;
import com.google.android.gms.maps.SupportMapFragment;
import com.google.android.gms.maps.model.BitmapDescriptorFactory;
import com.google.android.gms.maps.model.LatLng;
import com.google.android.gms.maps.model.MarkerOptions;

public class MapFragmentD extends SupportMapFragment {

    GoogleMap mapView;

    @Override
    public void onCreate(Bundle arg0) {
        super.onCreate(arg0);
    }

    @Override
    public View onCreateView(LayoutInflater mInflater, ViewGroup arg1,
            Bundle arg2) {
        return super.onCreateView(mInflater, arg1, arg2);
    }

    @Override
    public void onInflate(Activity arg0, AttributeSet arg1, Bundle arg2) {
        super.onInflate(arg0, arg1, arg2);
    }

    @Override
    public void onActivityCreated(Bundle savedInstanceState) {
        super.onActivityCreated(savedInstanceState);

        mapView = getMap();
        MarkerOptions markerOptions = new MarkerOptions();
        markerOptions.draggable(true);
        markerOptions.position(new LatLng(23.231251f, 71.648437f));
        markerOptions.icon(BitmapDescriptorFactory.defaultMarker());
        mapView.addMarker(markerOptions);
    }
}
Now Lets see How to display Ping on location


        mapView = getMap();
        MarkerOptions markerOptions = new MarkerOptions();
        markerOptions.draggable(true);
        markerOptions.position(new LatLng(23.231251f, 71.648437f));
        markerOptions.icon(BitmapDescriptorFactory.defaultMarker());
        mapView.addMarker(markerOptions);


Download SourceCode

Saturday, 12 January 2013

Android Map Application : Drawing straight path between two Geo point on android Map

Drawing overlay on map in android, we have discusses in previous article. I suggest you to go through that article for easy way to get current concept.  Projection class is responsible for converting device coordinate to Geo point and vice-versa.  Once we convert these point to each other, our task of drawing path between two Geo point becomes very easy.

So lets start consider that you have already make one map simple application in android. And look at screen of simple map application result using your Map API Key


Now divide further task in steps----

Step 1) Create two point to draw on map using OverlayItem. After creating two Geo point, we will create one class ItemizedOverlayItem  to populate these point on MapView

      ItemizedOverlayItem itemMized;  
      Vector<OverlayItem> allOverLArrayList = new Vector<OverlayItem>();  
      private void drawTwoPoint() {  
           itemMized = new ItemizedOverlayItem(getResources().getDrawable(  
                     R.drawable.ic_launcher));  
           GeoPoint geopoint = new GeoPoint(230286706, 72509145);  
           mapView.getController().setCenter(geopoint);  
           OverlayItem item = new OverlayItem(geopoint, "", "");  
           allOverLArrayList.add(item);  
           geopoint = new GeoPoint(222286706, 71509145);  
           item = new OverlayItem(geopoint, "", "");  
           allOverLArrayList.add(item);  
           itemMized.addOverLayItme(allOverLArrayList);  
           mapView.getOverlays().add(itemMized);  
           mapView.getController().setCenter(geopoint);  
      }  
   

Step 2) So lets populate our two point on map. In next step, we will draw a most awaited path.


 package com.ahmad.displaylineonmap;  
 import java.util.Vector;  
 import android.graphics.drawable.Drawable;  
 import com.google.android.maps.ItemizedOverlay;  
 import com.google.android.maps.OverlayItem;  
 public class ItemizedOverlayItem extends ItemizedOverlay<OverlayItem> {  
      public ItemizedOverlayItem(Drawable arg0) {  
           super(boundCenter(arg0));  
      }  
      @Override  
      protected OverlayItem createItem(int arg0) {  
           return mlocItems.get(arg0);  
      }  
      public void addOverLayItme(Vector<OverlayItem> mlocItems) {  
           this.mlocItems = mlocItems;  
           populate();  
      }  
      Vector<OverlayItem> mlocItems;  
      @Override  
      public int size() {  
           return mlocItems.size();  
      }  
 }  


Step 3) Now this tutorial creates a layer on map to draw a path between two Geo points.


 package com.ahmad.displaylineonmap;  
 import android.graphics.Canvas;  
 import android.graphics.Color;  
 import android.graphics.Paint;  
 import android.graphics.Point;  
 import com.google.android.maps.GeoPoint;  
 import com.google.android.maps.MapActivity;  
 import com.google.android.maps.MapView;  
 import com.google.android.maps.Overlay;  
 import com.google.android.maps.Projection;  
 public class OverLayClass extends Overlay {  
      Projection projection;  
      MapActivity mapActivity;  
      MapView mapView;  
      public OverLayClass(Projection projection, MapActivity act, MapView map) {  
           this.projection = projection;  
           mPaint = new Paint();  
           mPaint.setAntiAlias(true);  
           mPaint.setDither(true);  
           mPaint.setColor(Color.BLACK);  
           mPaint.setStyle(Paint.Style.STROKE);  
           mPaint.setStrokeJoin(Paint.Join.ROUND);  
           mPaint.setStrokeCap(Paint.Cap.ROUND);  
           mPaint.setStrokeWidth(12);  
           this.mapActivity = act;  
           mapView = map;  
      }  
      Paint mPaint;  
      public void draw(Canvas canvas, MapView mapv, boolean shadow) {  
           super.draw(canvas, mapv, shadow);  
           GeoPoint geopoint = new GeoPoint(230286706, 72509145);  
           Point pointOne = projection.toPixels(geopoint, null);  
           geopoint = new GeoPoint(222286706, 71509145);  
           Point pointtwo = projection.toPixels(geopoint, null);  
           canvas.drawLine(pointOne.x, pointOne.y, pointtwo.x, pointtwo.y, mPaint);  
      }  
 }  


Some points and lines need to be discusses here. One important thing is Projection which allows us to interchange device coordinate to Geo point. So look at this
        
                GeoPoint geopoint = new GeoPoint(230286706, 72509145);
Point pointOne = projection.toPixels(geopoint, null);
geopoint = new GeoPoint(222286706, 71509145);
Point pointtwo = projection.toPixels(geopoint, null);

Attaching Layer name Overlay class to map to create any figure
                       
                OverLayClass mOverLayClass = new OverLayClass(projection, this, mapView);
mapView.getOverlays().add(mOverLayClass);

So now its time for complete source code
                  

Download Complete Source Code 

Monday, 7 January 2013

Android Map Application : Making shape on android MapView using overlay and Touch event

Generally we know how to make sample application of map in android. Its quite easy. But we struck when we goes for advance like showing ping either single or multiple on map, drawing figure on map , drawing path between  two point. Consider all point, there is only one solution for all, and that is Overlay. Overlay consider to be layer on a MapView in android. Using and modifying Overlay almost match with View and SurfaceView.
This tutorial will cover  about drawing shape on android map.  This tutorial will go now steps wise

Step 1) Create one simple Map application

Step 2) Create one OverLayClass which extends Overlay. Overlay create one layer above map. We add this layer to MapView. This layer provide us to draw figure using canvas, path and paint

Step 3) Add OverLayClass to map. Now this layer will attach to our MapView to allow us to draw something. Overlay method onDraw calls every time we touch Overlay. So it enable our change to Overlays layer

Explanation About OverLayClass


Our task start when we touch the Overlay. We start counting point and draw on canvas using Path. For giving path a real look in constructor of OverLayClass we customize it's Paint class mPaint. We track three touch event ACTION_DOWN, ACTION_UP and ACTION_MOVE. And draw between ACTION_DOWN and ACTION_DOWN. Our path goes on increase between ACTION_UP and ACTION_DOWN.  Have a look at code

      private float oldX, oldY;  
      private float firstoldX, firstoldY;  
      private boolean isFirstTime = false;  
      @Override  
      public boolean onTouchEvent(MotionEvent arg0, MapView arg1) {  
           switch (arg0.getAction()) {  
           case MotionEvent.ACTION_MOVE:  
                touch_move(arg0.getX(), arg0.getY());  
                break;  
           case MotionEvent.ACTION_DOWN:  
                mapView.getOverlays().clear();  
                mapView.getOverlays().add(this);  
                touch_start(arg0.getX(), arg0.getY());  
                break;  
           case MotionEvent.ACTION_UP:  
                mPath.lineTo(oldX, oldY);  
                float mDistance = getDistanceBetwenFirstAndLastPoint();  
                Log.d("Distance F and L", String.valueOf(mDistance));  
                if (mDistance < 100)  
                     mPath.close();  
                isFirstTime = false;  
                break;  
           }  
           return true;  
      }  
      private void touch_start(float x, float y) {  
           mPath.reset();  
           mPath.moveTo(x, y);  
           oldX = x;  
           oldY = y;  
           if (!isFirstTime) {  
                firstoldX = oldX;  
                firstoldY = oldY;  
                isFirstTime = true;  
           }  
      }  
      private void touch_move(float x, float y) {  
           float dx = Math.abs(x - oldX);  
           float dy = Math.abs(y - oldY);  
           if (dx >= TOUCH_TOLERANCE || dy >= TOUCH_TOLERANCE) {  
                mPath.quadTo(oldX, oldY, (x + oldX) / 2, (y + oldY) / 2);  
                oldX = x;  
                oldY = y;  
           }  
      }  

Adding Overlay to android map

      private void setOverLay() {  
           OverLayClass mOverLayClass = new OverLayClass(projection, this, mapView);  
           mapView.getOverlays().add(mOverLayClass);  
      }  


You can close the path if you want. In OverLayClass you will get complete idea by seeing source code of application. Source code can be downloaded using link at the end of article.


Download Source

Android News and source code