Search This Blog

Sunday, 30 September 2012

Head to Head comparison iPhone 5 VS Samsung Galaxy |||

I works as android developer. If you ask a developer then android had no competitor in term of challenge and freedom of development tools. You can do almost anything because of its open source nature.
On launch of iPhone 5 i notice the phone in android can compete with iPhone are rare. Only Galaxy S3 can stands in some areas.
Hardware feature and neat and clean design of iPhone 5 drive me crazy. Lets have a look on head to head comparison between both so you able to decide which phone you have to bought


Body and Network Support 

Both phone support 2G, 3G, 4G network. iPhone is little lighter than galaxy s3 but Galaxy s3 wider than  iPhone 5 so we can consider the weight point baseless. In general bigger thing seems to be more heavier

External memory support 

As we already aware that iPhone does not support extra card slot. But it provide enough memory support  16/32/64 GB internal memory support. Galaxy s3 provide same internal memory support but except this it provide memory to be extends up to 64 GB using micro sd card slot. Both has 1 GB of RAM memory. On the sound note both phone are neck to neck

Camera and Other Support

both device have high quality of 8 MP(rear camera)  and almost same the front  camera. iPhone camera support Simultaneous HD video and image recording, touch focus, geo-tagging, face detection, panorama, HDR. And if we have look on S3 camera support then it support Simultaneous HD video and image recording, geo-tagging, touch focus, face and smile detection, image stabilization

Browser and Messaging Support

galaxy S3 support HTML and Adobe Flash but iPhone 5 support only HTML(Safari). In messaging, iPhone support iMessage, SMS (threaded view), MMS, Email, Push Email and Galaxy support SMS(threaded view), MMS, Email, Push Mail, IM, RSS

Where Galaxy lack behind 

Smooth design and Apple hardware are world class . So i think in these Galaxy s3 lack some what not much

Where iPhone lack behind 

Obviously the first loop hole in iPhone is to removing Google map. Their map do no have good user experience. Even though Apple CEO apologies to iPhone user for removing Google Map. And so many Google product does not support well in iPhone. Even though iPhone remove the NFC from iPhone is major
 set back. iPhone does not have flash support also.
                      

Price Comparison

Samsung Galaxy S3 cost in indian rupee is around  Rs 36000 and iPhone cost  Rs 46500.

Which one to prefer 

I hope you do not need to choose and you can have both. But if you are compelled to choose between them then i will recommend Galaxy S3

Saturday, 29 September 2012

Java Interview Questions

Java is my all time favorite programming language because of its strong networking support and other strong features. Facing interview in java is always a challenge because of it broad view of concept.  Some question are repeatedly ask in interview while you goes for java as experience person or as fresher. Some of question i have faced two or three times . I am listing them below so that you guys does not struggle to give answer to them.

Q1. What is the difference between String and String Builder/String Buffer?

Ans. String object is immutable , immutable means we can not change the values store inside a string object. Let a example
                                 String temp="Hello";
If you append anything to temp then it will create a new object if append a different string to temp.
                                temp="Hello"+ "Check";

Printing temp will show "Hello check" but internally we have created two object while append "Check" to temp. Same process goes when you use trim method of String. So to improve performance we recommend to use String Buffer/String Builder. Both are mutable and we can changes the value of them without generating a new object.

Now important point is that String Buffer is synchronized and String Builder is not. So if you are not using threading , use String Builder else String Buffer. String Builder was introduce in java 1.4 but String String Buffer was launched in Java 1.5 version

Q2. What is the difference between Design Pattern and Framework?

Ans. Design Pattern is the Pattern designed by Java to make Java Application. It describe how to divide our complete java application into three part i.e MVC


  • Model : This part will handle only Business logic (Communication with Data Base).
  • View : This part only have presentation logic.
  • Controller : This part of logic contain the overall control flow (What should application has to do when a request comes from a Client).
Framework is a small s/w which has been designed by using Design Pattern. And it contain Web Application deployment architecture 

i.e  Spring, EJB 

Q3. What is the difference between passivation and activation?

Ans. While we client is not using any data then its store on secondary storage, this is called passivation but when client send a request to use that piece of data then it loaded into main memory  and this refers as activation process.

Q4. Explain Difference HashTable and HashMap?

Ans. Here is some key difference between them ---
  •  Hashtable is synchronized, whereas HashMap is not. This makes HashMap better for non-threaded applications, as un synchronized Objects typically perform better than synchronized ones.
  • Hashtable does not allow null keys or values. HashMap allows one null key and any number of null values.
  • One of HashMap's subclasses is LinkedHashMap, so in the event that you'd want predictable iteration order (which is insertion order by default), you could easily swap out the HashMap for a LinkedHashMap. This wouldn't be as easy if you were using Hashtable.
Q5. Differnce between Vector and Array List?

Ans. Vector is synchronized whereas Array List is not synchronized . Using Vector inside threading application is recommended as it avoid insertion and deletion at once by throwing UnSupportedException

Q6. What is difference between Abstract class and Interface ?

Ans. Java does not support multiple inheritance so this restriction is some what avoided using interface . You can implement multiple interface in a single class but can not extends more than one class at time.
  • When you implement an interface to a class then its compulsory to override all method of interface (if class is abstract then its not necessary). But if you extends a abstract , there is no such necessity 
  • Abstract class implementation is fast
  • Interface provide only signature of method not code. but abstract class can have code for method
  • Interface'method is implicitly abstract

Thursday, 27 September 2012

Career as Mobile Application Developer

There was a time when smartphone was limited to business man, as technology advances mobile change the circumstance of all trends and become so popular in all age of people. We can not think to live without a mobile that does not have social networking, Email, Location base services or M-Commerce application like Paying bills etc.

Mobile take the games like Temple Run, Angry Bird on a new high notes and ensure the safety and growth of people related to mobile application development. 2012 is witnessing a new growth level in mobile development, new player had come into competition and a lot more to come


Market Status and Industry Status - Mobile application market is growing rapidly and gaining popularity as emerging job opportunities market. If we talk about just India then its third fastest growing market for android app. Let have look on India statistics As per Gartner report, India's active mobile connections will exceed 900 million by 2016, which translates to 72% penetration. According to Trai in January 2012 the number of active mobile connections in India has reached 659.99 million and the total mobile subscriber base stands at 903.72 million.


This is just about one country USA, China and every other country are growing at rapid pace in smart phone mobile user either iPhone or android or windows Phone or blackberry. If we think as developer, then these are the excellent opportunities

Growth Areas - This booming industry is struggling to get quality developers who have ideas and creativity. Go to any job site and you will observe the number of jobs that come under the M-VAS industry. Here the demand and supply ratio is inadequate and industry is looking for talented professionals. Planning a career in this industry will surely be a good move.
As it can be seen, there is more demand than supply because there aren't enough good mobile developers. As mobile phone companies look to attract users through applications, the demand for application developers is growing and will grow.

growth as individuals are also have great chance .Imagine how much you are going to earn if you make a game like angry bird on any platform either android or iPhone


Skill-sets required - It  slightly varied and depends for which platform you want to develop an application for android it need knowledge of java for iPhone you should be good enough in objective C. But overall we can say, one wants to become a mobile app developer, one would need to be proficient in a programming language such as C, C++, Objective C for writing applications on iOS (iPhone, iPad) or Java (Android, Blackberry OS)

For further assistance you can continue-sly visit this blog about mobile application development


Article You May Like           How to write an effective resume


Media player example in android with seek bar

Playing audio in android is very simple. It provides a lots of tool to handle life cycle of Media Player. We can play a audio file from following source

  • Playing from Resource
  • Playing from local i.e sdcard 
  • Playing from online URL 
Android provide some listener to handle how your song will play, to handle when your song completed, to forward song or to backward song.
I have make one simple application of media player that will play media from above three specified source. Lets discuss one by one


  • Playing from resource -  suppose you want to give one custom notification in an application. so better to keep this sound file inside raw folder and play it from there using Media Player. In this simple we do not need any bigger complexity                 
  • 1:  MediaPlayer mediaPlayer = MediaPlayer.create(this, R.raw.sor);  
    2:  mediaPlayer.start();  
       

  • Playing from sdcard or online - These both ways are quite similar. We have to prepare Media Player to be ready for playing music either from sdcard or online URL.  But in online URL case we used  mediaPlayer.prepareAsync(); as we do not know how much time URL will take to respond. Immediately when Media Player prepared, called onPreparedListener();  and we start music. 
When music file played completely then listener onCompletionListener() gives us a way to start a new song or played it again. 
These are piece of line that will play a online URL

1:       /**  
2:        * Give the online url  
3:        */  
4:       private void PlayOnlineUrl() {  
5:            String url = "http://www.gaana.mp3"; // your URL here  
6:            MediaPlayer mediaPlayer = new MediaPlayer();  
7:            mediaPlayer.setAudioStreamType(AudioManager.STREAM_MUSIC);  
8:            try {  
9:                 mediaPlayer.setDataSource(url);  
10:            } catch (IllegalArgumentException e) {  
11:                 e.printStackTrace();  
12:            } catch (SecurityException e) {  
13:                 e.printStackTrace();  
14:            } catch (IllegalStateException e) {  
15:                 e.printStackTrace();  
16:            } catch (IOException e) {  
17:                 e.printStackTrace();  
18:            }  
19:            mediaPlayer.prepareAsync();  
20:            // You can show progress dialog here untill it prepared to play  
21:            mediaPlayer.setOnPreparedListener(new OnPreparedListener() {  
22:                 @Override  
23:                 public void onPrepared(MediaPlayer mp) {  
24:                      // Now dismis progress dialog, Media palyer will start playing  
25:                      mp.start();  
26:                 }  
27:            });  
28:            mediaPlayer.setOnErrorListener(new OnErrorListener() {  
29:                 @Override  
30:                 public boolean onError(MediaPlayer mp, int what, int extra) {  
31:                      // dissmiss progress bar here. It will come here when  
32:                      // MediaPlayer  
33:                      // is not able to play file. You can show error message to user  
34:                      return false;  
35:                 }  
36:            });  
37:       }  

                                                       Screen Shot will be look like

Media player


Main thing remains now is, Extracting information of song file to show in the list. Even though i have not used this feature anywhere in my sample media player example but android provide a way to extract information about song like image, Song name, Album name, Year, Rating etc

If you are using Media query to fetch URL(From content provider) then you will get all information using cursor index else you can use MediaMetadataReceiver  class to find information about currently playing song.  These information will return as null if not available so checking these condition to avoid UN-necessary crash of application is very useful.

Note - MediaMetadataReceiver   is available only after API level 10


Generally this application run Media Player inside the main thread. But we recommend to play a media player inside a service so we have to bind a service with activity .Please see this how to bind a service and updating UI
                                             

                                        Download Source Code of Media Player

Action Bar Tab with Fragments example in android

Before getting started with Fragment, See creating Tab with action bar.  Fragment support in android from API level 11 naturally. But if you want to use fragment below this API level then you need to add backward support library, else it will work fine with any library support above API level 10.

These important classes are used while implementing fragment -

  • FragmentManager
  • FragmentTransaction
FragmentTransaction is responsible to add Fragment, Remove Fragment and commit transaction.

If we start from basic step by step- Then first we will get FragmentManager and and will assign it to FragmentTransaction.

                 fragMentTra = getFragmentManager().beginTransaction();  

Now we have object of FragmentTransaction, so we can perform any addition, removal of new Fragment classes.

I have integrated action bar tab with fragment. I have Three classes FragMent1, FragMent2, FragMent3. On changing of Tab every time i added new fragment inside a Relative Layout. So it looks like you are changing activity inside a Tab Layout.

In my main activity, On changing of action bar Tab i added a new Fragment Every time and remove the previous one. So the output of these procedure is look like screen shot given below

                   
               Fragment With ListView
   
Fragment with Grid View

Fragment with Just Simple Image
Now our main concern is to adding  and removing Fragment inside a Relative Layout, You can take other layout also

1:  if (tab.getText().equals("Listing")) {  
2:                 try {  
3:                      rl.removeAllViews();  
4:                 } catch (Exception e) {  
5:                 }  
6:                 fram1 = new FragMent1();  
7:                 fragMentTra.addToBackStack(null);  
8:                 fragMentTra = getFragmentManager().beginTransaction();  
9:                 fragMentTra.add(rl.getId(), fram1);  
10:                 fragMentTra.commit();  
11:            } else if (tab.getText().equals("Image")) {  
12:                 try {  
13:                      rl.removeAllViews();  
14:                 } catch (Exception e) {  
15:                 }  
16:                 fram2 = new FragMent2();  
17:                 fragMentTra.addToBackStack(null);  
18:                 fragMentTra = getFragmentManager().beginTransaction();  
19:                 fragMentTra.add(rl.getId(), fram2);  
20:                 fragMentTra.commit();  
21:            } else if (tab.getText().equals("Details")) {  
22:                 try {  
23:                      rl.removeAllViews();  
24:                 } catch (Exception e) {  
25:                 }  
26:                 fram3 = new FragMent3();  
27:                 fragMentTra.addToBackStack(null);  
28:                 fragMentTra = getFragmentManager().beginTransaction();  
29:                 fragMentTra.add(rl.getId(), fram3);  
30:                 fragMentTra.commit();  
31:            }  
32:       }  

So this is how we are handling of Fragment. The main benefit is that we have only one activity in complete application. And We separate the complexity of code by using different classes of Fragment.

Every Fragment has one Life Cycle like activity. in oncreateView method we will create the design and will return it. In this method we have inf-later to add one complete layout inside a fragment .

                                                                   Download Source Code

Sunday, 2 September 2012

Action Bar with Tab in android

In android latest version, TabLayout had deprecated because of its some constraint. Now we Action bar that mainly replace Menu in recent version. Most importantly we can use action bar as replacement of TabLayout also.

For using Action Bar, we need to use getActionBar(); method that will return action bar object. even you can use Menu xml to create a Action Bar but here i am creating Action Bar dynamically.

 ActionBar bar = getActionBar();  
                bar.addTab(bar.newTab().setText("Tab 1").setTabListener(this));  
                bar.addTab(bar.newTab().setText("Tab 2").setTabListener(this));  
                bar.addTab(bar.newTab().setText("Tab 3").setTabListener(this));  
                bar.addTab(bar.newTab().setText("Tab 4").setTabListener(this));  
                bar.setDisplayOptions(ActionBar.DISPLAY_SHOW_CUSTOM  
                          | ActionBar.DISPLAY_USE_LOGO);  
                bar.setNavigationMode(ActionBar.NAVIGATION_MODE_TABS);  
                bar.setDisplayShowHomeEnabled(true);  
                bar.setDisplayShowTitleEnabled(false);  
                bar.show();  

you can hide Action bar if you want 

 bar.hide()  

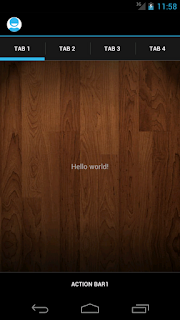
The we can perform and detect action state of action bar tab by implementing TabListener .So out of final code will be like this
Action with tab
Action Bar with Tab
                                               
But this source will run only the version from 3.0
                                                                  Download Source Code

Saturday, 1 September 2012

ListView example in android with Image and Text Labels

ListView is core component of android. Its feature of binding data dynamically and efficient loading is awesome. It give us lots of command and make our task easy. If you are not aware from Listview then first read How to create simple Listview

There are three component in Listview Android
  • ListView Control Widget
  • Base Adapter
  • Activity
Base Adapter is used to bind data dynamically inside Listrow. So these are the few basic steps to create a Listview in Android

Step 1). Create Two Layout, one for Listview and activity background Second for ListView Row. Here i have taken ListActivity so ListView layout is not needed.


listrow.xml
 <LinearLayout xmlns:android="http://schemas.android.com/apk/res/android"  
   xmlns:tools="http://schemas.android.com/tools"  
   android:layout_width="fill_parent" android:background="@drawable/strip"  
   android:layout_height="wrap_content"  
   android:orientation="horizontal" >  
   <ImageView  
     android:id="@+id/iamge"  
     android:layout_width="60dp"  
     android:layout_height="60dp"  
     android:layout_margin="4dp"  
     android:contentDescription="@string/app_name" >  
   </ImageView>  
   <TextView  
     android:id="@+id/text1"  
     android:layout_width="wrap_content"  
     android:layout_height="wrap_content"  
     android:layout_marginLeft="20dp"  
     android:layout_gravity="center_vertical"  
     android:padding="@dimen/padding_medium"  
     android:paddingLeft="10dp"  
     android:text="@string/hello_world"  
     android:textColor="@android:color/black"  
     android:textStyle="bold" />  
 </LinearLayout>  

Step 2) Create one Activity as controller to control and work like a bridge between BaseAdapter and Layout

 package com.simplelistviewwithlistactivity;  
 import android.app.AlertDialog;  
 import android.app.AlertDialog.Builder;  
 import android.app.ListActivity;  
 import android.os.Bundle;  
 import android.view.Menu;  
 import android.view.View;  
 import android.widget.ListView;  
 public class ListActivityS extends ListActivity {  
      int[] img = { R.drawable.r1, R.drawable.r2, R.drawable.skycubemap1,  
                R.drawable.skycubemap1, R.drawable.skycubemap2,  
                R.drawable.skycubemap3, R.drawable.skycubemap4,  
                R.drawable.skycubemap5 };  
      @Override  
      public void onCreate(Bundle savedInstanceState) {  
           super.onCreate(savedInstanceState);  
           getListView().setDividerHeight(2);  
           getListView().setAdapter(new BindDataAdapter(this, img, item));  
      }  
      @Override  
      protected void onListItemClick(ListView l, View v, int position, long id) {  
           super.onListItemClick(l, v, position, id);  
           Builder builder = new AlertDialog.Builder(this);  
           builder.setMessage(item[position] + " is clicked.");  
           builder.setPositiveButton("OK", null);  
           builder.show();  
      }  
      @Override  
      public boolean onCreateOptionsMenu(Menu menu) {  
           getMenuInflater().inflate(R.menu.activity_list, menu);  
           return true;  
      }  
      private String item[] = { "This is list Item1", "This is list Item2",  
                "This is list Item3", "This is list Item4", "This is list Item5",  
                "This is list Item6", "This is list Item8", "This is list Item8" };  
 }  

Step 3) Adapter( or so called BaseAdapter)

 package com.simplelistviewwithlistactivity;  
 import android.app.Activity;  
 import android.content.Context;  
 import android.view.LayoutInflater;  
 import android.view.View;  
 import android.view.ViewGroup;  
 import android.widget.BaseAdapter;  
 import android.widget.ImageView;  
 import android.widget.TextView;  
 public class BindDataAdapter extends BaseAdapter {  
      Activity mLocal;  
      int[] imgArray;  
      String titleA[];  
      LayoutInflater mLayoutInflater;  
      public BindDataAdapter(Activity activity, int[] imageArray, String[] title) {  
           mLocal = activity;  
           imgArray = imageArray;  
           titleA = title;  
           mLayoutInflater = (LayoutInflater) activity  
                     .getSystemService(Context.LAYOUT_INFLATER_SERVICE);  
      }  
      public int getCount() {  
           return imgArray.length;  
      }  
      public Object getItem(int position) {  
           return null;  
      }  
      public long getItemId(int position) {  
           return 0;  
      }  
      private class Holder {  
           ImageView image;  
           TextView textView;  
      }  
      public View getView(int position, View convertView, ViewGroup parent) {  
           Holder holder = null;  
           if (convertView == null) {  
                convertView = mLayoutInflater.inflate(R.layout.activity_list, null);  
                holder = new Holder();  
                holder.image = (ImageView) convertView.findViewById(R.id.iamge);  
                holder.textView = (TextView) convertView.findViewById(R.id.text1);  
                convertView.setTag(holder);  
           } else {  
                holder = (Holder) convertView.getTag();  
           }  
           holder.image.setBackgroundResource(imgArray[position]);  
           holder.textView.setText(titleA[position]);  
           return convertView;  
      }  
 }  
You can download source code and play with it. This code output will be like that

Complex ListView
ListView With Image
Biggest advantage of using BaseAdapter and ListView, is its efficient loading capacity. BaseAdapter bind view to ListView when every row created first time then it keeps all already created row in memory and load them from memory. This make ListView damn fast

In my code i have Holder class that make sure that we will inflate a row layout only when row is created first time
                                                                      

                                                          Download Source Code


Simple Listview example in android

Creating Listview in android is pretty simple if you want a simple list. There are two way using it

  • Creating Listview using Listview control widget

  • Creating Listview using ListActivity 

If you are using second method then it implicitly give a Listview to add data using BaseAdapter. While using Listview we add data dynamically using Adapters like ArrayAdapter, CursorAdpter etc.
So now we will create a just simple Listview using ListActivity and we will bind data to Listview with the help of ArrayAdapter 

These are the basic steps to create a simple List

Step 1). Create one class to and extends ListActivity in-spite of activity

Step 2). Create one layout for row of Listview

 <TextView xmlns:android="http://schemas.android.com/apk/res/android"  
   xmlns:tools="http://schemas.android.com/tools"  
   android:id="@android:id/text1"  
   android:layout_width="fill_parent"  
   android:layout_height="60dp"  
   android:layout_centerHorizontal="true"  
   android:layout_centerVertical="true"  
   android:background="@android:color/white"  
   android:gravity="left|center_vertical"  
   android:padding="@dimen/padding_medium"  
   android:paddingLeft="10dp"  
   android:text="@string/hello_world"  
   android:textColor="@android:color/black"  
   android:textStyle="bold"  
   tools:context=".ListActivity" />  

Now you output will be like this screen shot 

Simple Listview
Listview
Step 4) Binding Data to ListView

      private String item[] = { "This is list Item1", "This is list Item2",  
                "This is list Item3", "This is list Item4", "This is list Item5",  
                "This is list Item6" };  
      private void TakeOneArrayAdapterToaddData() {  
           ArrayAdapter<String> adpter = new ArrayAdapter<String>(this,  
                     R.layout.activity_list);  
           for (String str : item)  
                adpter.add(str);  
           getListView().setAdapter(adpter);  
      }  

Step 4) Performing click event on Listview's item 

set click listener on Listview and override method

      @Override  
      protected void onListItemClick(ListView l, View v, int position, long id) {  
           super.onListItemClick(l, v, position, id);  
           Builder builder = new AlertDialog.Builder(this);  
           builder.setMessage(item[position] + " is clicked.");  
           builder.setPositiveButton("OK", null);  
           builder.show();  
      }  


Selected ListView'Item
Selected Item
                                                             

                                                                        Download Source Code

Next Article Creating ListView with Image and Label
Android News and source code